Saturday 27 June 2020

Sauerkraut

This Saturday sees me in the kitchen having a first try at making Sauerkraut. The success of my preserved beans and brussel sprouts last week has me excited to take it a little further this week and tackle one of the big boys of preserving Sauerkraut. As I mentioned last week the importance of the preserved foods as part of a balanced diet is important and as Sauerkraut and its Korean cousin kimchee become increasingly popular and cool they also increase in price. With that in mind there is clearly a need to get on the task of making them from scratch. Today I will start with Sauerkraut and maybe next week have a go at Kimchee. 
Step 1. Shred up a whole cabbage into fine strips. Basically you are making coleslaw. I used a knife but you could also use a mandolin or the shred blade on your food processor. I also added 4 carrots grated and 1 long green chilli for a spice hit.
Step 2. Put all the ingredients into a bucket or large bowl and add 45 grams of salt. You need to add between 2 and 3 percent salt to weight of ingredients. Now comes a little exercise. It is a bit like kneading bread but much quicker. Scrunch the cabbage mix in your hands and mix and scrunch and mix and scrunch until you get a good amount of water extracted. Once you have about a cup or so of liquid in the bottom of the bucket you are done. 
Step 3. Transfer the cabbage mix to jars and pour in the liquid which has accumulated in the bottom of the bucket. Push the cabbage down so that it is totally submerged. Cover with the outer leaves of the cabbage so that your Sauerkraut stays submerged. 


The minimum time to leave the sauerkraut is around 5 days but can be left for weeks longer as well. The other thing I should have mentioned earlier is that the reason I am able to preserve these foods without specialised equipment is that the temperature in Sydney at this time of year is in the ideal range between 15 to 25°C which makes the task so much simpler than if attempting this in the summer time. 
The only problem with preserving is the wait. Until next time, happy cooking!!! 


Sunday 21 June 2020

Sunday Morning Preserving - Updated with results after a week of preserving


Sunday morning. Late Sunday morning / early afternoon actually. It paints a more enthusiastic picture of my approach to life to say Sunday morning. I had half a bag of green beans in the refrigerator and a few of the world's most harshly criticised vegetable the brussel sprout leftover from the week's cooking. I have noticed of late that there is quite a bit of hype around the preserving of foods and the positive impact those foods can have on gut health. I have read that Doctors are starting to take a more holistic approach to medicine and the health of the gut can have massive impact on the overall health and well-being of the individual. So with that in mind and also the general less waste is better for the world at large and better for my bank balance as well I thought it would be great to give vegetable preserving a go. As a Chef the medical opinions above come free of charge and with very little actual knowledge of the medicine involved. 

So moving on to the fun. Since this is a first time attempt at this for me I am keeping it simple. I am using just salt, water and the vegetables that are on hand. If I can get the basics right then maybe down the track I will get a bit more expansive.

The basic formula for preserving is this: vegetables + water + salt at a ratio of 2.5% of the combined weight of the vegetables and water = preserved vegetables after waiting for between 4 days minimum and up to 4 weeks keeping at a temperature between around 15 to 25 degrees. From there tighten the lid and store in the Fridge to use as required. 

Step 1. First thing on the agenda is to wash jars and sterilise them in hot water. If you have a dishwasher this is simple. Pop them into the dishwasher and you are good to go. If you are like me and don't own a dishwasher then simply wash the jars in soapy water and rinse and soak in boiled water from your kettle to complete the sterilisation. Don't dry with a tea-towel as they contain bacteria which could undo all your good work. Let the air do the job. 

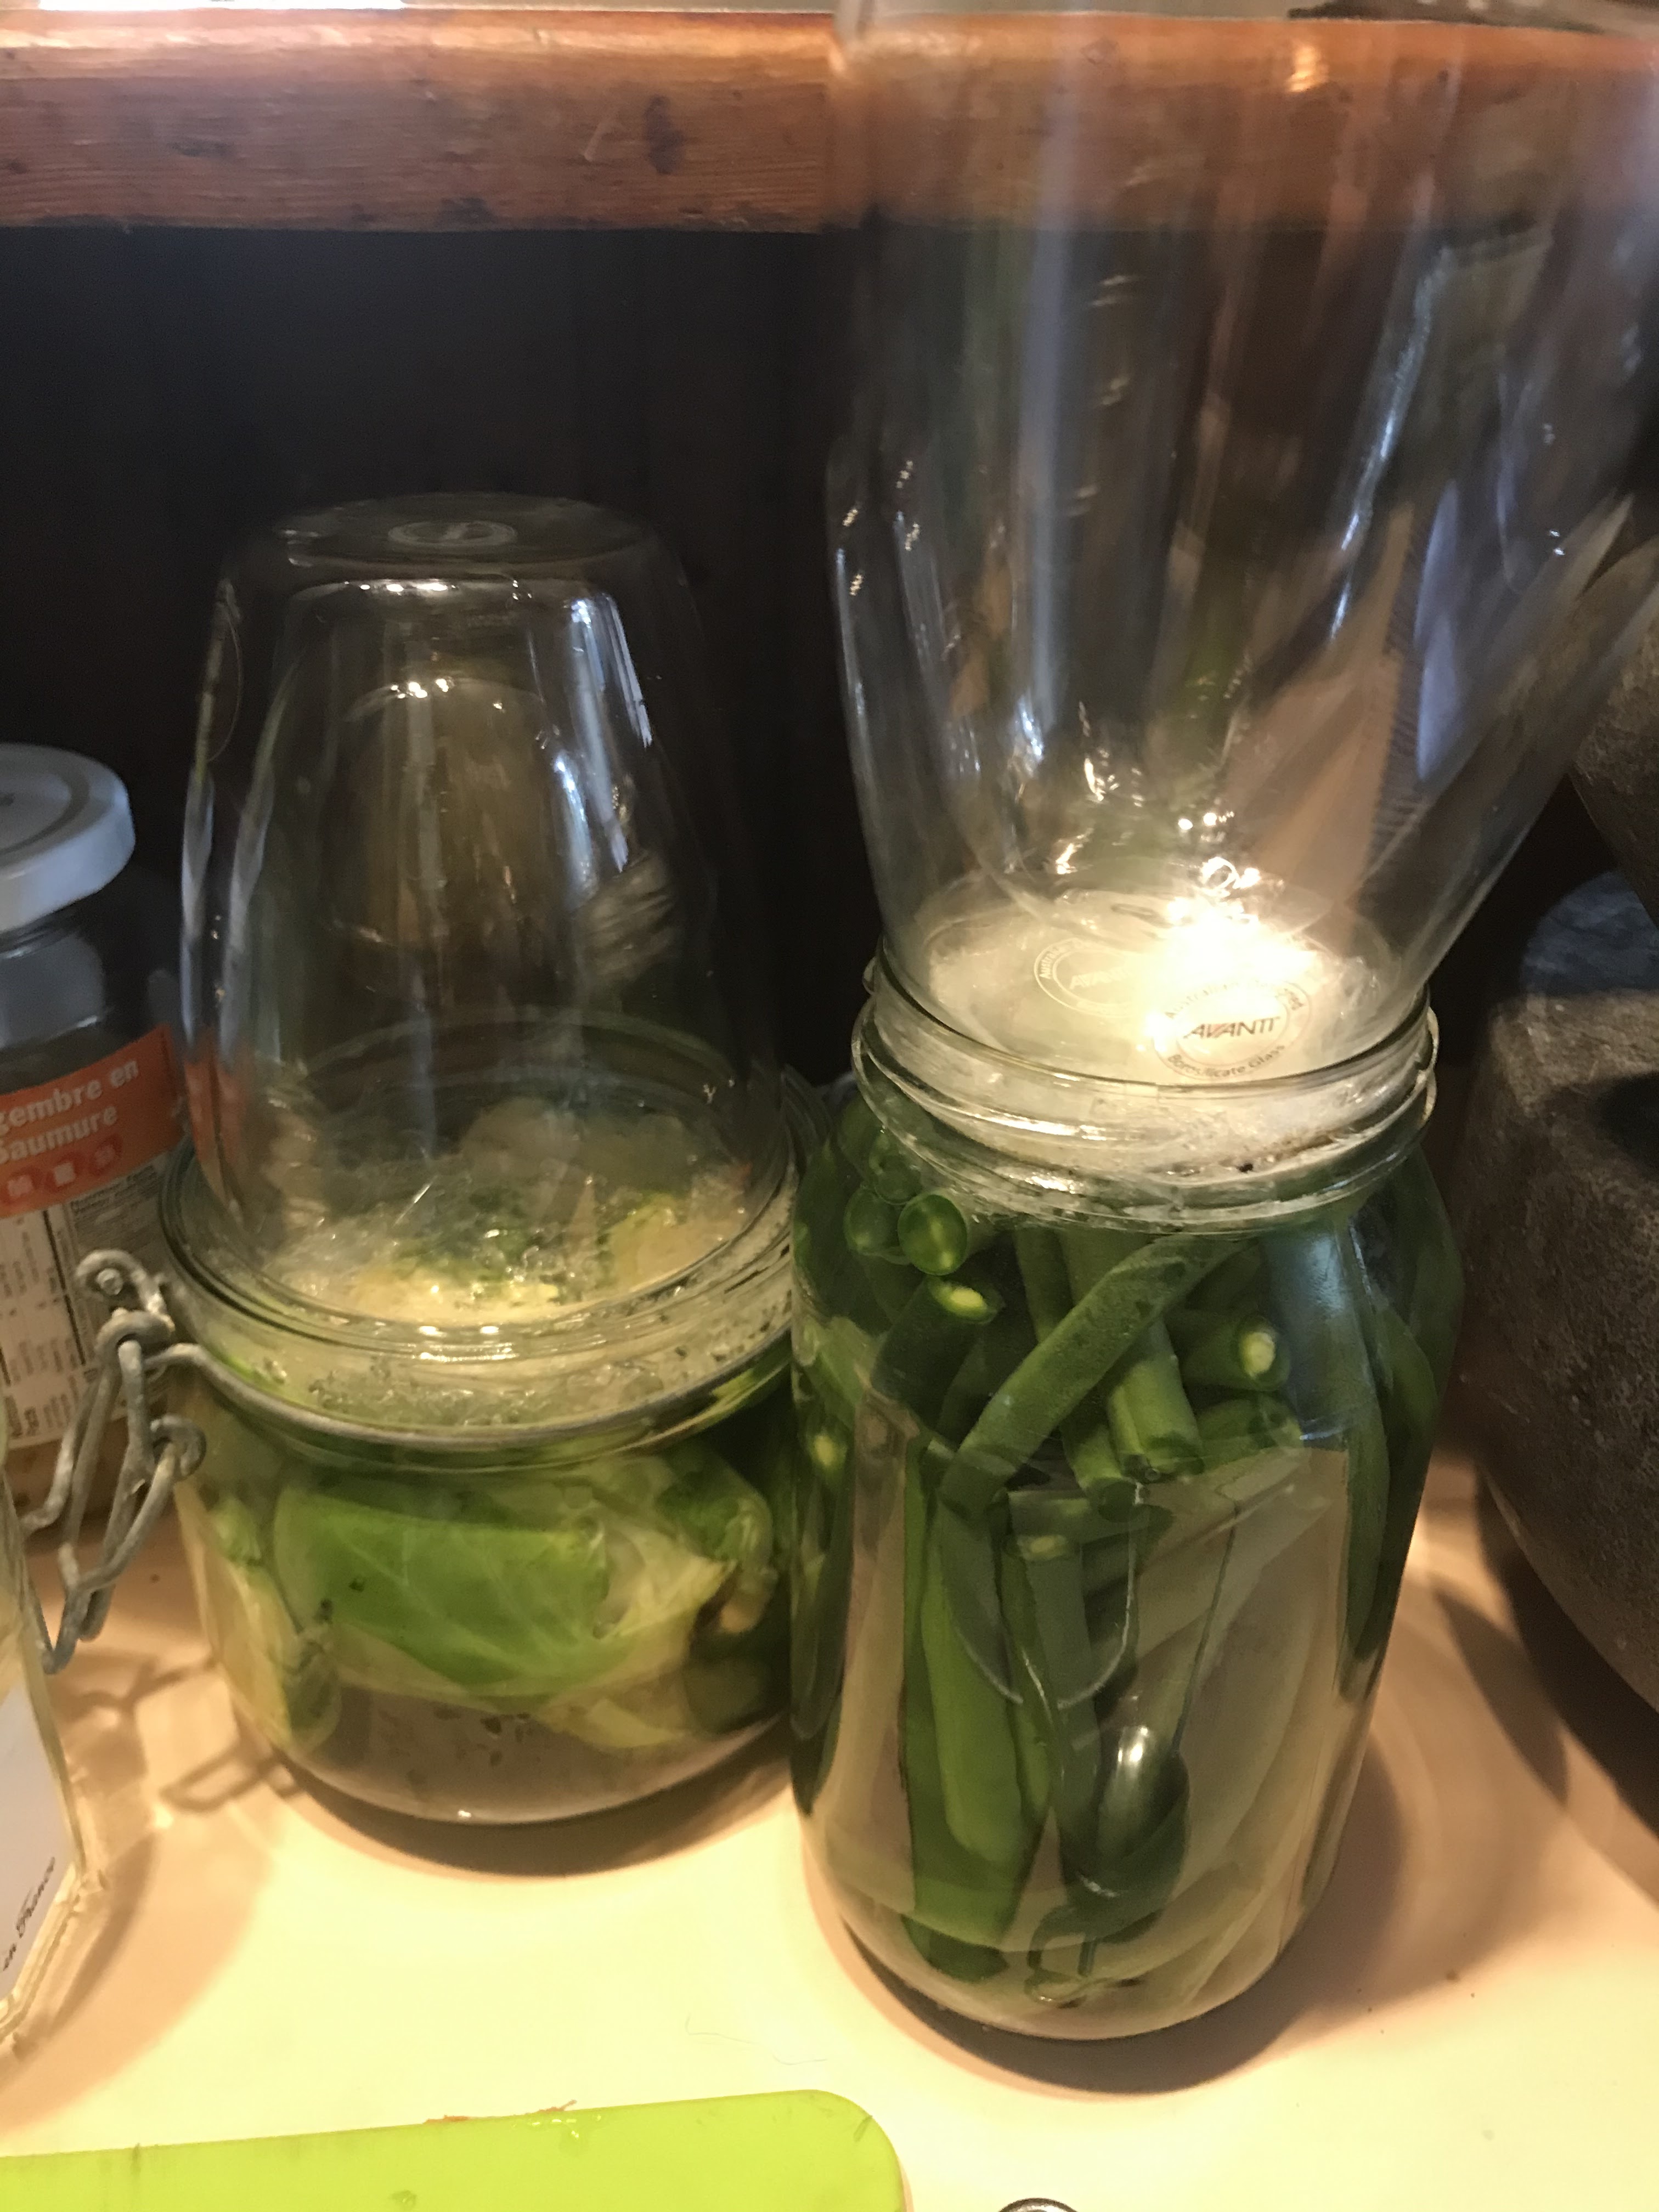
Step 2. Cut and wash the vegetables. So for the beans I topped and tailed them and then double washed them. The Brussel sprouts were cut in half through the root and then washed. 
Step 3. Load the jar or jars with the vegetables until almost full. Oops!! Forgot one thing. Prior to loading up the jar, put it onto your digital scales and zero the scales so that you can weigh the vegetables. Fill the jar with water until the vegetables are totally submerged. 
Step 4. Now for the very simple multiplication. Take the total weight of the beans or brussel sprouts and the water. Then simply multiply by 2.5% or 0.025 and you have the amount of salt you need to add. So if you have 489 grams of water and beans as I did in the second of my jars you simply need to pull out you mobile phone and using the calculator type in 489 x 0.025 which will give you the answer 12.225 grams. 

Step 5. Pour most of the water into a separate jar. Add that jar to the scales and add in the 12 or 13 grams of salt. If your scales are like mine they probably only measure whole numbers so 12 or 13 grams will be perfect for the preserving to be activated. 

Step 6. Put a lid on the jar which now contains only salt and water. Shake vigorously until the salt is dissolved. If you don't shake well enough then you'll lose some of the salt in the bottom of your jar.
Step 7. Add the salt solution back into the jar with the vegetables and put something over them to keep them submerged but also allow the CO₂ to escape into the air. I have put a small amount of cling-wrap on the top of the jar, under where the lid would screw on and gently pushed it down to submerge the top layer of beans or sprouts. I have now placed the lids on the jars but not screwed them on. This will allow the reactions to take place without bursting the jars. (I hope) Finally Label your jars with the date that you started the preserve so that it will be easy to keep track. 

Well, what can I say. The process is cheap and easy. Better than cheap, it saves on wastage. I will be updating this page with photos each day as the process continues. Fingers crossed in four days time we will have some preserves that are a great little healthy snack or even a welcome addition to a garden salad. Until next time, happy cooking!!!
Results
Yay, success. It is Saturday morning and I have just munched on a few green beans and a couple of brussel sprouts and I they were both great. The Brussel sprouts are definitely my favourite. I think that by cutting the sprouts in half I have allowed for penetration by the salt and it has given a greater tangy flavour. The beans are still nice and crisp and will be a great little healthy snack or a crisp tangy addition to a salad. All in all I would have to say it has been a win. Next job Sauerkraut!!!!

Tuesday 9 June 2020

Recipe - Raspberry Jam

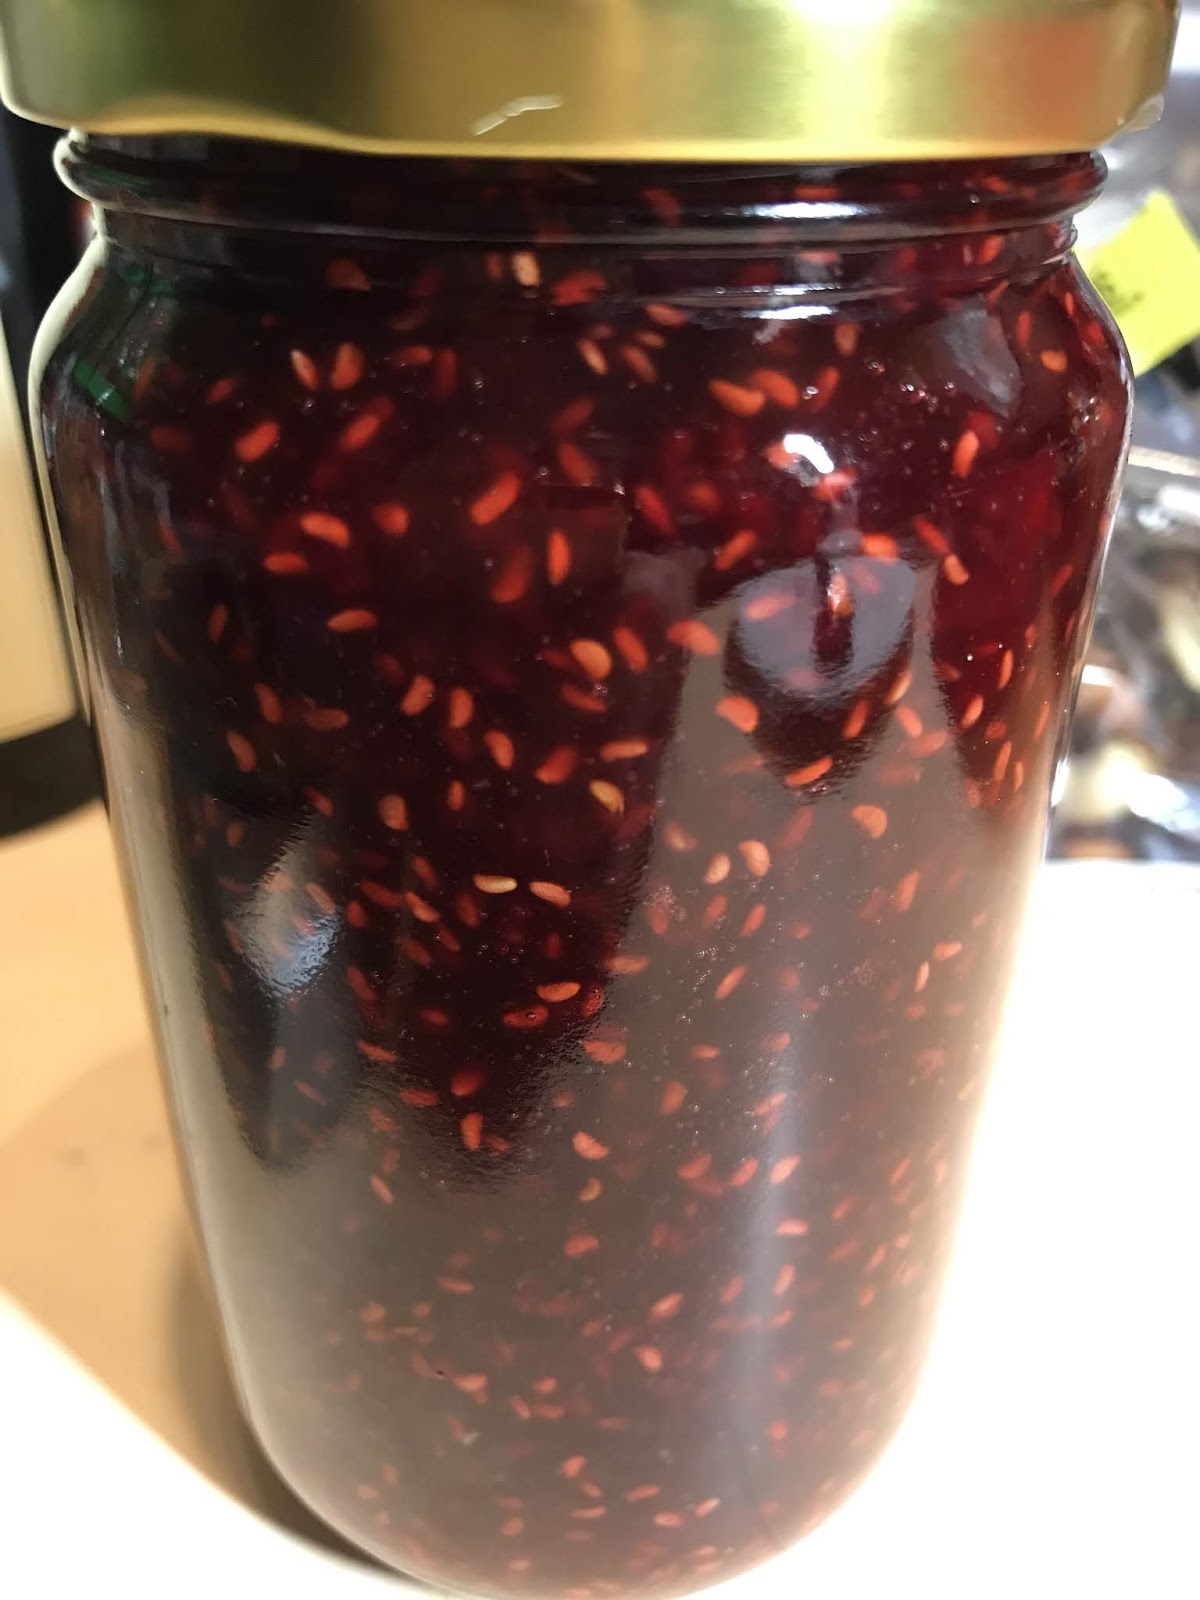
Monday of the Queen's Birthday long weekend. Time to make a small amount maybe a jar or two of raspberry jam.
I went around the house looking for recipes. Went old school actually looked in books. Found a few raspberry jam recipes, but it was one in particular that stood out. It was in my Paternal Grandmother's cookbook. The book doesn't seem to have a print date in it so I am unsure of the book's age. It is called Australian home cookery and I love that I can get this chance to test it out. My Grandmother passed away in the second half of the 1970's so I guess the book is from the 1950s. Just a guess. All the measurements are in ounces and pounds. For this recipe which has only 2 ingredients the ratio is more important than the quantity. 
There may be one little issue. I will be using frozen raspberries. I grabbed a half kilo packet from Coles and am not sure how they will react, but you son't find out unless you have a go. 


Recipe 
Ingredients 
Raspberries 500 grams (frozen, I'm guessing fresh are better)
White Sugar 380 grams

Method :
1. In a bowl top the raspberries with 190 grams of your sugar. Cover and refrigerate overnight. I was considering just leaving for a few hours but as this recipe contains only sugar and raspberries I think having some patience here will be beneficial. The extra time will give the sugar time to draw out more of the liquid from the berries.  


2. After allowing the Raspberries to sit overnight quite a large quantity of liquid is drawn out of the berries and it is in this liquid that we will cook the jam. In the picture above on the right you can hopefully get an idea of just how much liquid has come out of the berries. If you can't quite see maybe you can take my word for it that there is quite a lot. To this we add the other half of our sugar  and then add to a suitable sized saucepan.


3. Bring to a boil over high heat. Remember there is no need to add anything else. I say this in part because I was thinking that maybe I should add water or some of the packet of Jamsetta that I purchased at the supermarket. No. No. No. Nothing in this recipe except raspberries and sugar. Sitting at my computer 2 hours after cooking and jarring I believe that I am right. It requires nothing else. I think I have made that point. Where were we? That's right bring to a boil. Boil rapidly and reduce heat to medium when the threat of having red splashes of jam scattered all over the kitchen gets too much for you. Simmer until the jam thickens. I this case it took about 12 minutes total cooking time. It was surprisingly simple.


4.Test to see if the jam is thick enough. Place  a small side plate into the freezer when you start cooking. Remove plate from freezer and scoop a teaspoon full of hot jam onto the plate. Allow to cool for a minute and then run a recently washed finger through the cooled jam. If it stays parted like the red sea then the jam is cooked, If not continue to simmer and reduce for a few more minutes and try again. 

5. Time to jar your delicious jam. Allow to cool a little, maybe wait 30 minutes and then pour into sterilised jam jar to cool. If you are in a hurry to give it a try. Haha, who wouldn't be? Put enough to spread over a sandwich into your freezer for a few minutes to speed the cooling and then spread it on a slice of fresh bread. Or whip up a quick batch of scones. (it could happen) 

6. Spread on bread with or without butter. Eat. Feel that all is good with the world, at least your tiny corner for this 18 seconds of eating time.


Sunday 7 June 2020

Food pictures from the last fortnight


Roast red capsicum frittata with sweet potato and rocket. Roast off red capsicum, sweet potato and onion. Blanch rocket with boiling water. Mix all together with beaten egg and cheese and oven roast for 30 minutes


Eggplant parmagiana. Salt, rinse and dry sliced eggplant. Layer eggplant, Napolitana sauce, and cheese, top heavily with mozzarella cheese


Roast Pork Shoulder. Season generously with salt and pepper and neutral oil. Place in baking tray on top of mirepoix of carrot, onion and celery. Roast in a dry oven tray at 250°C 15 minutes + 230°C 15 minutes before adding red wine and water and reducing heat to 170°C for another couple of hours of cooking. The pieces of pork pictured above are 6 to 8 kg each. 

Spaghetti Boscaiola. Bacon, mushrooms, shallots or onions and garlic into an oiled saucepan. Add in white wine, reduce. Then cream. Lots of cream. Mix sauce with Spaghetti, parmesan cheese and parsley. Don't visit your Doctor until you've spent a couple of days eating vegetables.


Above is a burger topped with a chickpea pattie which is then coated in breadcrumbs and oven roasted served on a brioche roll with baby spinach, sliced tomato and cheese. Add some mayo and sweet chilli to finish off nicely

Tender, juicy, succulent Roast Beef. The same basic preparation as for the roast pork above. Add red wine to the base of the pan. At the end of cooking this will leave some fantastic juices in the base of the pan to start off your gravy. Cover the beef in foil and roast at 150°C for 90 minutes, then remove the foil and continue to roast until the temperature probe reads around the 55°C mark. Too low you say? The residual cooking on these big lumps of meat will carry them up to where you and your food safety people need it to be. 
I think this is a Thai red curry ... or was it green, definitely with chicken. I think it got a little watery on me. Flavour was still good, I think. Some days I come home and can't even remember what I cooked that day. Crazy. 
Scrambled eggs cooked quickly over medium heat. Whisk eggs, salt, pepper and cream together. Pour mixture into heated, oiled pan and keep the eggs moving to stop them catching on the pan. As long as you don't try cooking them whilst watching TV in the living room at the same time it couldn't be easier
Bringing a little bit of Thai comfort food to Sydney. Grabpao Gai or Thai Chicken mince and basil stir fry. Garlic, Oyster Sauce and fish sauce. Good news for the coriander haters out there, this dish contains none. I've gone against tradition and bulked mine our with green beans and Chinese broccoli. Served with steamed Jasmine rice and topped with a fried egg. Not sure the customers with enjoy a true heavily fried Khai Dao or star egg.


Breakfast regulars oven roasted tomatoes alongside deep fried hash browns. Why any human needs a deep fried side to their breakfast is beyond me and probably your GP as well. Having said that they do add texture and they are quite yum. Some people might tell you that an apple is yum too and has texture 
Chunky slow braised Chili con Carne with beans and topped with fresh tomato and coriander. A great dish to warm you up on a chilly winter's day
Lamb Korma curry marinate the lamb with ginger, garlic, coriander , cumin cardamom and cayenne pepper for heat. Add tomato and simmer until tender. Finish by adding yoghurt. This dish is an example of my current desire to move away from store bought pastes which make life easier and move towards more in house spice mixes.

Love's Kitchen

  I was doing the regular scan of Netflix and Prime video on Saturday night and found this "food movie"  on Prime. The story is ab...