Sunday 26 July 2020

Recipe - Kimchi

Another busy Sunday morning of preserving should see me testing out my homemade Kimchi in time for next weekend. Again I have used the incite and descriptions from LifebyMikeg on instagram to get the basic recipe and then run with it. Another preserved food that hopefully helps with the growth of good bacteria to give the body overall health and well-being. 
As you can no doubt tell I am really getting into preserving and also just the why buy processed supermarket style if you can do it yourself. The way I see it by making it yourself you can control what goes into your food and by doing so limit the intake of dodgy additives in your daily diet. A recent visit to the Doctor and a blood test or 2 later and I found out that my Cholesterol was on the high side. The Doctor has given me six months to get it right through diet and exercise and then if I can't make the changes I'll have to start popping pills to fix the problem. The way I see it, at age 46 I can either use this as a motivation for change or join the masses in becoming a medicated member of society. The choice is simple. The diet part of the equation has to include improved gut health and preserved foods like kimchi and sauerkraut with their active good bacteria are part of the journey.
So before I get too bogged down let's get to the recipe...

Ingredients :
2 large Chinese Cabbages
Salt
4 small red apples (peeled and cored)
½ Daikon Radish 
4 tablespoons Korean Red Pepper Powder
Fish Sauce
4 Tablespoons of Glutinous rice flour
1 Litre of water
4 cm knob of Ginger
4 cloves Garlic
Description:
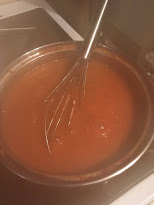
1. First thing is to cut up your cabbages by slicing across the leaves at 2 cm intervals to evenly slice the leaves. Once sliced up season very generously with salt, cover with a couple of dinner plates or other weighted item to apply pressure to your cabbage and force out the liquid. Leave to stand overnight. Whilst I originally had the cabbage in a stockpot and a large mixing bowl after a few hours I was able to transfer it all to the stockpot and weight it down with 2 dinner plates and cover with the lid of the stockpot to prevent the chance of any unwanted things getting into the cabbage.
2. Onto the fun stuff. Rinse the cabbage with water to wash off the salt and then drain thoroughly. I used a salad spinner to help with the drying. Dice up your apple and shred or grate the radish. Place the diced apple in water to stop the browning. I used the a green papaya shredded to shred the radish but you could just grate or even dice the radish.

3. Peel garlic and ginger and whizz in a food processor to a fine mince. 
 
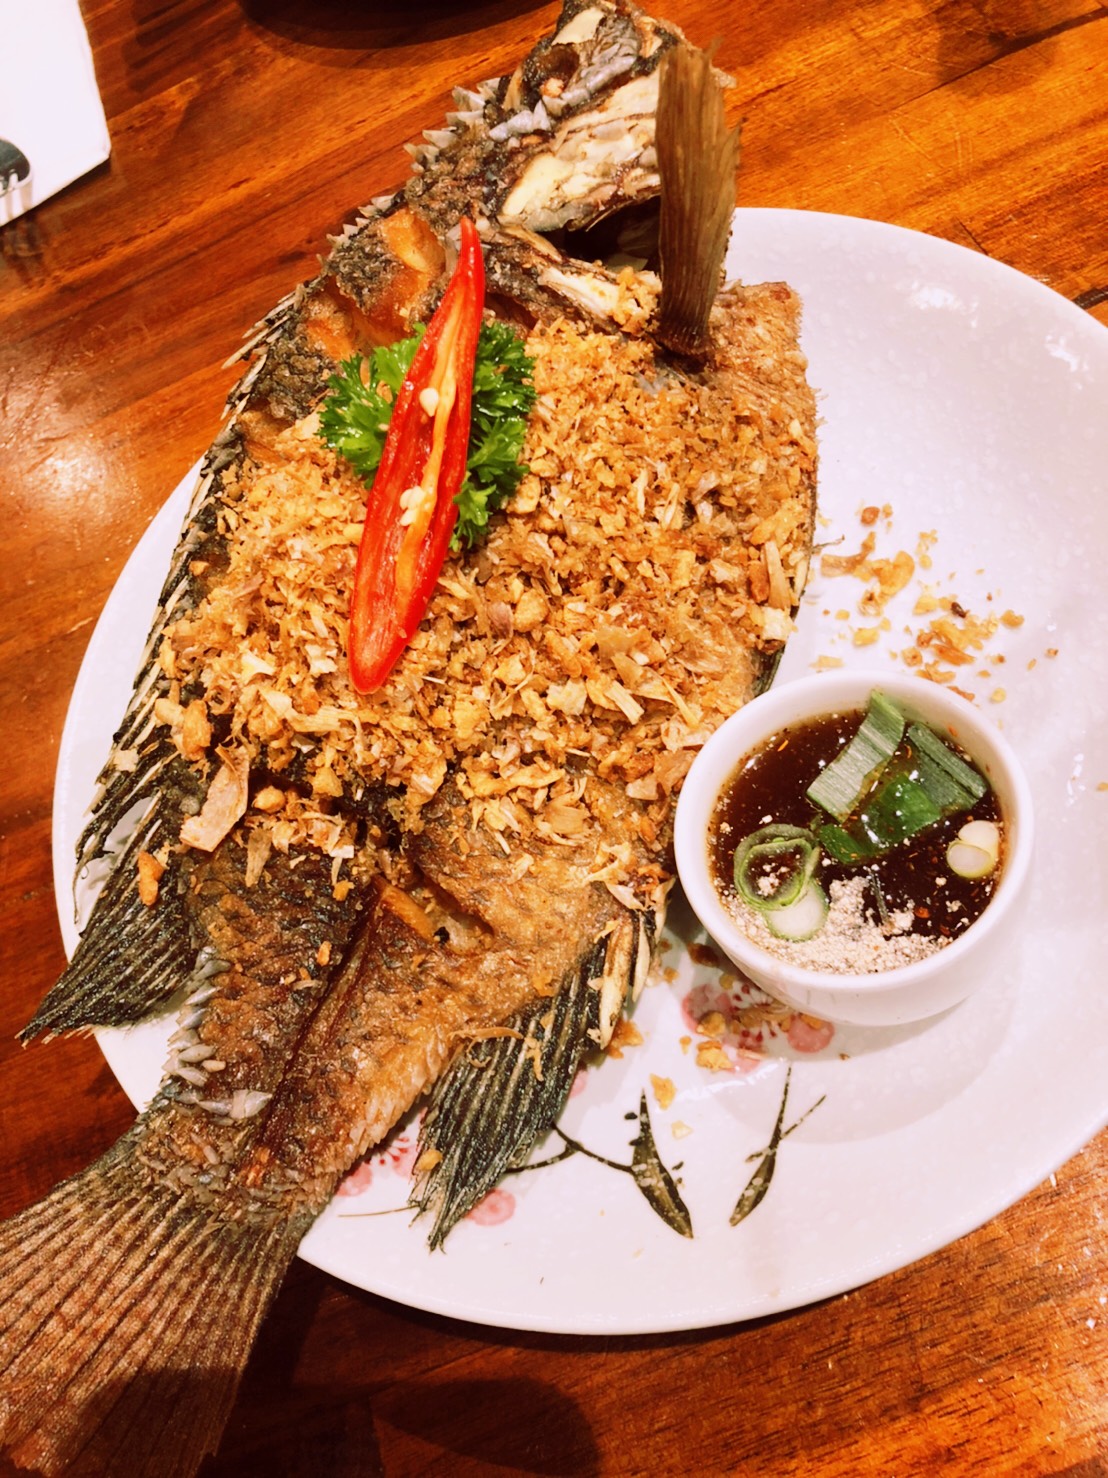
4. Add the water and flour to a saucepan and whisk enthusiastically to dissolve the flour in the water to form a white paste. Add in the ginger and garlic and whisk to mix through. Add in the Korean Chilli powder to form a thick red paste. This paste is what gives the kimchi it's distinctive red colouring. Allow to cool, at least enough so that you are able to mix it with the cabbage without either cooking the cabbage or possibly more importantly, burning your hands. 
5. Now put the apple cabbage and radish together in  large bowl. Pour over the red paste and mix thoroughly so that the cabbage is evenly coated. 

6. Once done transfer the kimchi to large jars to let the preserving begin. I have heard that the preserving takes between 3 and 7 days but as this is my first time making I will have to wait and see what is successful. Each day during the preserve I will be forcing the cabbage down into the jars to make sure that the cabbage is fully submerged. In fact after about the first 4 hours I will be using the Pestle from my Thai Green Papaya Krok to force the cabbage beneath the surface of the kimchi liquid. As the jars will be sealed I will need to remove the lids each day to allow gas to escape and prevent the reactions from causing breakages to the glass jars.

Whilst we are all wondering when we will see an end to Covid and and restrictions on our lifestyles it is great to be able to spend the time indoors doing something productive and who knows, maybe I can turn this into a business that one day pays the bills. Until then it is just a fun way to spend a Sunday. Happy cooking!!!


Tuesday 14 July 2020

Thai Thae Hurstville

Tuesday night saw our first dine in meal since the Covid pandemic hit our shores back in early March and it was to Thai Thae at Hurstville that we decided to pay a visit for our 7th Anniversary of our Thai Wedding in Chiangmai back in 2013. Of course we had to eat Thai food. 
This local place has a great range of dishes which includes the usual suspects but then takes it to another level with plenty of interesting dishes to keep you coming back. I wrote a review for this restaurant a few years ago on my old semi retired blog and said it was great then. Back then the menu seemed a little limited but now the menu has expanded quite a bit and I can't wait to get back and give it another try. 

So, on to our meal. Initially we were thinking 2 mains and an entree but then decided that if we grabbed a green papaya salad we could try two others mains no worries at all. So that is what we did.

Thai food is traditionally eaten as shared dishes amongst the group of people eating. Basically all the food to be eaten is put on the table and each person has a plate of rice and eats by taking small amounts (around two spoonfuls) of each dish one at a time and eating with the rice . In Thai dishes are described as gup Khaao or in English "with rice", and used almost to flavour your rice. This view is obviously a little challenging for Europeans and probably others as well, but could be thought of in a similar way to the way Italians think of flavouring pasta with sauces which are far less saucy that those used by those of us eating pasta in other parts of the world.

Maybe I need to get back on track. We ordered three great dishes. Som Dtum or Green Papaya Salad which was good, though I asked for medium heat and found the spiciness a little less than I like. Next time I'll need to ask for hot. If Som Dtum is new to you, make sure you give it a try. It is a salad made up of shredded green papaya which is pounded up with a wooden pestle with garlic, chilli, palm sugar and more to give a spicy, sweet and salty salad.

We also had the Deep Fried Tilapia with garlic. Thai fish is fried whole, no batter, just deep fried I think, in a wok until cooked through, then topped with enough fried garlic to cover the fish almost completely. You would think this would be too garlicky but the garlic is mellowed by the frying and extremely delicious. It was on this occasion. It is also served with a house made sauce to dip your fish in after you pull the flesh away from the bones. Give it a try, it is great and has the added bonus of attracting table envy from nearby patrons.
 
And our final dish we picked from the Chef suggestions portion of the menu called Kai Look keuy. You will notice that the menu item is written in transliterated Thai and is therefore fairly unhelpful to non Thai speakers. Kai is egg and the rest, well your guess is as good as mine. The description underneath the item on the menu though drew me in and I had to give it a try. I was not disappointed. That description said "Medium boiled eggs and deep fried and crispy pork topped with sweet and sour tamarind sauce" The sentence structure may not have won you an English prize in High School but the plate of food was a winner. Eggs boiled and then deep fried served on a bed of crispy pork belly mouthfuls swimming in a sweet and sticky tamarind sauce. Yes you are right, this is not something you GP wants you eating daily, though you would keep him busy if you did, but it was absolutely yum.
This was a great meal at a very affordable price and comes highly recommended by this happy eater. Great to be back out eating after lock-down and hope everyone behaves so we can continue to eat out more and more. Until next time , Happy Eating!!!

Thai Thae Restaurant - Shop 1, 33 MacMahon Street, Hurstville, NSW

Sunday 5 July 2020

Recipe - Green Sriracha Chilli Sauce


Sunday morning preserving. Last night we ate a German sausage plate with my homemade Sauerkraut which I have made last weekend. It tasted great, so on the heels of that success it was time to give the amazing Thai Green Sriracha Chilli sauce a go. Red Sriracha is great but I must say that my tastes lean slightly towards the Green lesser known cousin because it has a little more acidity to it and is awesome for adding a little heat and flavour to a dish where the flavours aren't jumping up hitting you in the face. 

Where should we start? A little bit of history perhaps? Why not? I stole these facts from a Los Angeles Times article which appears to have taken them from a documentary film called "Sriracha". So, it turns out the Sriracha Sauce is made in the U.S.A. by a Vietnamese immigrant who was a refugee from the Vietnam War, also known as the American War if you are Vietnamese to differentiate it from the numerous other wars in that 331,212 km² country. That makes Vietnam about 40% of New South Wales in terms of size. In terms of impact on modern history it is fair to say they are punching above their weight. But I digress. Huy Fong Foods is the name of the company which makes Sriracha and it's owner David Tran has been making it since the 1970's when he saw a need for hot sauce in his new home country. He borrowed the recipe and adapted it from a Thai hot sauce recipe which originates in Si Racha District in Chonburi province which is 120 km South East of Bangkok. The snippets of information about David Tran seem pretty cool and are well worth checking out. 

And on to the sauce.

The amazing thing about Sriracha is that it is a fermented chilli sauce which is why I have tagged it under preserving. 

So... I grabbed a bag of long green chillies because they were on special at the local fruit shop and I de-seeded most of them, not sure how much heat I will be left with, but as they say "live and learn". After de-seeding I put them along with a little ginger and a couple of garlic cloves into my food processor with a tablespoon each of brown sugar, white sugar and salt and on high whizzed for 4 minutes. After about a minute the mix had me a little anxious about the texture but within 2 minutes the liquid had released from the chillies and by the end I was left with a chunky wet chilli mass. 
It is almost too easy to call it a recipe. I transferred the sauce to a glass Pyrex bowl with a lid and will now begin preserving until next weekend. Each day I will give it a good stir. The objective is to turn the sauce each day to stop prolonged exposure to the air. 

Well that's about it for now. Will (promise I really will) add to this post next Saturday or maybe even Friday if I get too impatient to wait. The process at that point is to add a little vinegar, maybe rice vinegar or white vinegar and process it to a fine sauce. I have seen that in some recipes they cook the sauce after adding the vinegar but I will be playing it by ear and if cooking seems unnecessary I will be bottling and devouring. 
So, it's next Saturday. and after stirring or more accurately turning over the chunky green goodness that is my sauce daily from Sunday to Saturday I have taken the next steps to completion. Things to note: After a couple of days you will notice that tiny air bubbles pop up after turning the chilli paste. The reason for this is that the carbon dioxide is attempting to escape from the chillies. At least I think that is what is happening. The chilli paste could be left to ferment longer but for this first attempt I am far too impatient and excited to wait longer than 6 days. In future attempts I hope to lay down longer ferments and see what will be the impact on the flavour and appearance. That is for another day.

Okay so what I need to do is add the chilli mass to a blender with vinegar. I used about 90 ml of rice wine vinegar and white vinegar. I then blended until I had a smoothish green liquid of spicy joy. Okay, so here is where it got a little tricky. The original recipe I watched said that this is all you had to do. Jar it, fridge it and enjoy the fruits of your labours. I looked up a number of recipes on the net and found that most, if not all added a heating step (probably to kill bacteria and mellow flavours). I was unsure but thought I should travel with the herd and decided to heat the sauce in a small saucepan for 10 minutes. The usual here, bring to boil and then reduce heat and simmer. 10 minutes total. 
Once done allow to cool (whilst you finish a blog post) and then jar it up for storage. Once cooled sufficiently I decided that the sauce would be improved by pushing it through a strainer. I added a ladle at a time to a small hand held strainer and pushed through the sauce with the back of a wooden spoon. Ladies and Gentlemen we have a jar of Green Sriracha. Yay!!! 
Conclusion: The two steps that I added on the run, being the heating of the sauce for 10 minutes and the pushing through a strainer both improved the finished product in my opinion. I think the heating gave a more rounded flavour to the sauce and has hopefully added to it's shelf life. Having said that, a long shelf life may be irrelevant with this first batch because I am planning to eat it pretty quickly. Once it becomes a part of my regular preserving though I may slow down consumption and need it to last more that a week or two. Step two the strainer I think really adds to the professional long and texture of the sauce. Obviously you could leave either or both of these steps out and see how it goes.
Until next time, Happy cooking!!! 

Love's Kitchen

  I was doing the regular scan of Netflix and Prime video on Saturday night and found this "food movie"  on Prime. The story is ab...