Tuesday, 13 October 2020

Restaurant Review - Chi Koko , Hurstville


 Korean Fried Chicken in Hurstville. Friday night, looking for a fun place to eat. Spoiler alert this one turned into a winner. Cliché alert winner, winner chicken dinner. 

Okay that's clearly a dubious start to a post. Let's get this back on track. Friday night saw Pinkie and I looking for an inexpensive meal before a night in to watch the first NRL semi final. At least one of us had the idea that he would be home in time to see the footy. Korean fried chicken has been on my radar for some time and this restaurant with a smallish menu was worth a try. With the new normal rules in action we signed in at the door and got a table for 2 by the window to Forest Road. This restaurant is in the part of Forest road that leads up to the Ritz Hotel. There are probably 10 little places on this small stretch of road many with unusual elements to their type of cuisine that set them out from the crowd and entice the adventurous eater to give them a go. That was the case with Chi Koko.

Korean fried chicken suggests that this is not a dieters paradise unless it is cheat day. With a somewhat limited menu that took a bit of bravery and let's just give it try and if we order wrongly we'll know for next time approach we ordered. We asked the waitress for a bit of help and she was friendly in her advice and her English was close to perfect so that wasn't a problem but at the end of the brief interaction I wasn't much wiser. The main issue was had I ordered enough food. Turns out we had.

We went with the Mad Red Koko boneless fried chicken ½ serving size which had a 2 out of 3 chilli rating for spiciness. As well we got a serve of Tteokbokki pronounced tok-bOk-gii. At least that's my understanding and 6 dumplings. 

In hindsight I think we guessed our way to success. As they say "fortune favours the brave" or should it be "hunger satisfaction favours the brave". Maybe the original slides off the tongue a little better.  

The dishes all came together and I also grabbed a Korean beer because it was there, it was Friday night and I had heard that beer and fried chicken go well together. In fact the menu contains a few nice offerings from a beverage viewpoint. There are 6 beers on offer, 2 of them Korean, as well as Soju which Wikipedia describes as clear, colourless distilled beverage of Korean origin with an alcohol content between 16.8 and 53% alcohol. That's quite a difference. There were also a number of flavoured Soju's on the menu and Korean Rice wine and Raspberry wine as well. Maybe another time.

After a short wait we received our dishes and didn't they look great. Tasted fantastic too. Where to start? Let's go with the Dumplings. The dumplings were pan fried similar style to a Gyoza. Truthfulness is important when blogging right? I have no idea what was in the dumpling. Possibly vegetarian. The menu didn't give a clue. Just said Dumplings 6 or 12. They do make a good point I think without making a point. Do you want dumplings? how many? That's all you need to know. And weren't they tasty. Fantastic texture. As I noted earlier, similar to a Gyoza. That also made me think, is it politically wrong to to describe a Korean Dumpling as being similar to a Japanese dumpling? Is this the kind of think that could cause an international incident? I plead ignorance and onto the Tteokbokki. 

No surprise that the spellcheck doesn't consider that a word. Let's go through it again ... Tok-bOk-gii. Turns out to be another delicious mystery food. Quick google search describes it as spicy stir fried rice cakes. So it comes in a red sauce that I assume is made with Gochujung chilli spice paste and then liquified to make it a saucy stir fry. The rice cakes come in 2cm cylinders and flat triangles which reminded me of squid. There was a hidden spice to the dish and there is the option, which we didn't take, to top it with cheese. Doesn't topped with cheese really add some magic to any dish? Lactose intolerant eater at the table so not for us. And ....

The star of the show. The one and only Korean Fried chicken. Beautifully cooked. Didn't have the greasiness of the chicken of Kentucky and had some genuine heat that was fantastic. I love it when the heat is just right, it gives mouth filling joy that compels you to want more. This was the case on this occasion. Crispy, Juicy, flavourful and just plain yum.

In summing up, the meal was great and would highly recommend everyone in Southern Sydney check it out. Not all at once as we have this pandemic thing going around. Have you heard about it? 

Have to note that there was a notice on the blackboard in the restaurant saying that a new menu is on the way. Will have to return to check it out. 

I would have to give them an 8 out of 10. Great value for money and nothing bad to say about the delicious food. 


Saturday, 3 October 2020

Lesson 1 : Braising


 Welcome to lesson 1 of my guide to making you a better cook. The first lesson in the series is on Braising, which is traditionally a great way to make use of the cheaper parts of the animal which have been more heavily used during the animals life and require longer, slower methods of cookery to make them more palatable and flavoursome. Why start with braising? Quite simply it is probably my favourite method of cooking. Is that a good enough reason? Probably not but hey, what's the point of being in charge if you can't decide which path to follow. There are other reasons to start with braising as well. It is a simple method of cooking which brings great flavours and aromas to your meal and your home whilst you are cooking. Is there anything better than arriving through the front door and just as you turn the door handle you catch the waft of delicious food smells drawing you inside? There may be a couple of things in your life that better it but day to day this is definitely up there. 

In today's lesson I will outline 3 basics dishes which will be used to highlight the braising technique that I believe will help you understand and give a little window into where you can take this style of cookery. The first will be a European influenced Braised Lamb shank recipe, the second an Asian slow cooked pork shoulder and a third will give either a vegetarian side dish to be enjoyed alongside any nights dinner or as a stand alone vegetarian meal, a simple braised mixed vegetables. 

First lets start with a quick bit of history and theory on braising. Promise I'll keep it brief.  The word braise dates back to the 18th century. It comes from the French word of the time for coal. It refers to the practice of putting coals under and on top of the cooking vessel to create the heat to cook the food inside of the box shaped vessel. The vessel with a secure fitting lid was placed on the coals and covered over the top by more coals. I told you I would keep it brief.

 Technique

The important part of this lesson is not to copy a few recipes but more importantly to uncover the techniques so you will be either able to understand the recipes you are using or to cook with true freedom and creativity to make something that is truly your own creation.

Steps to braising success

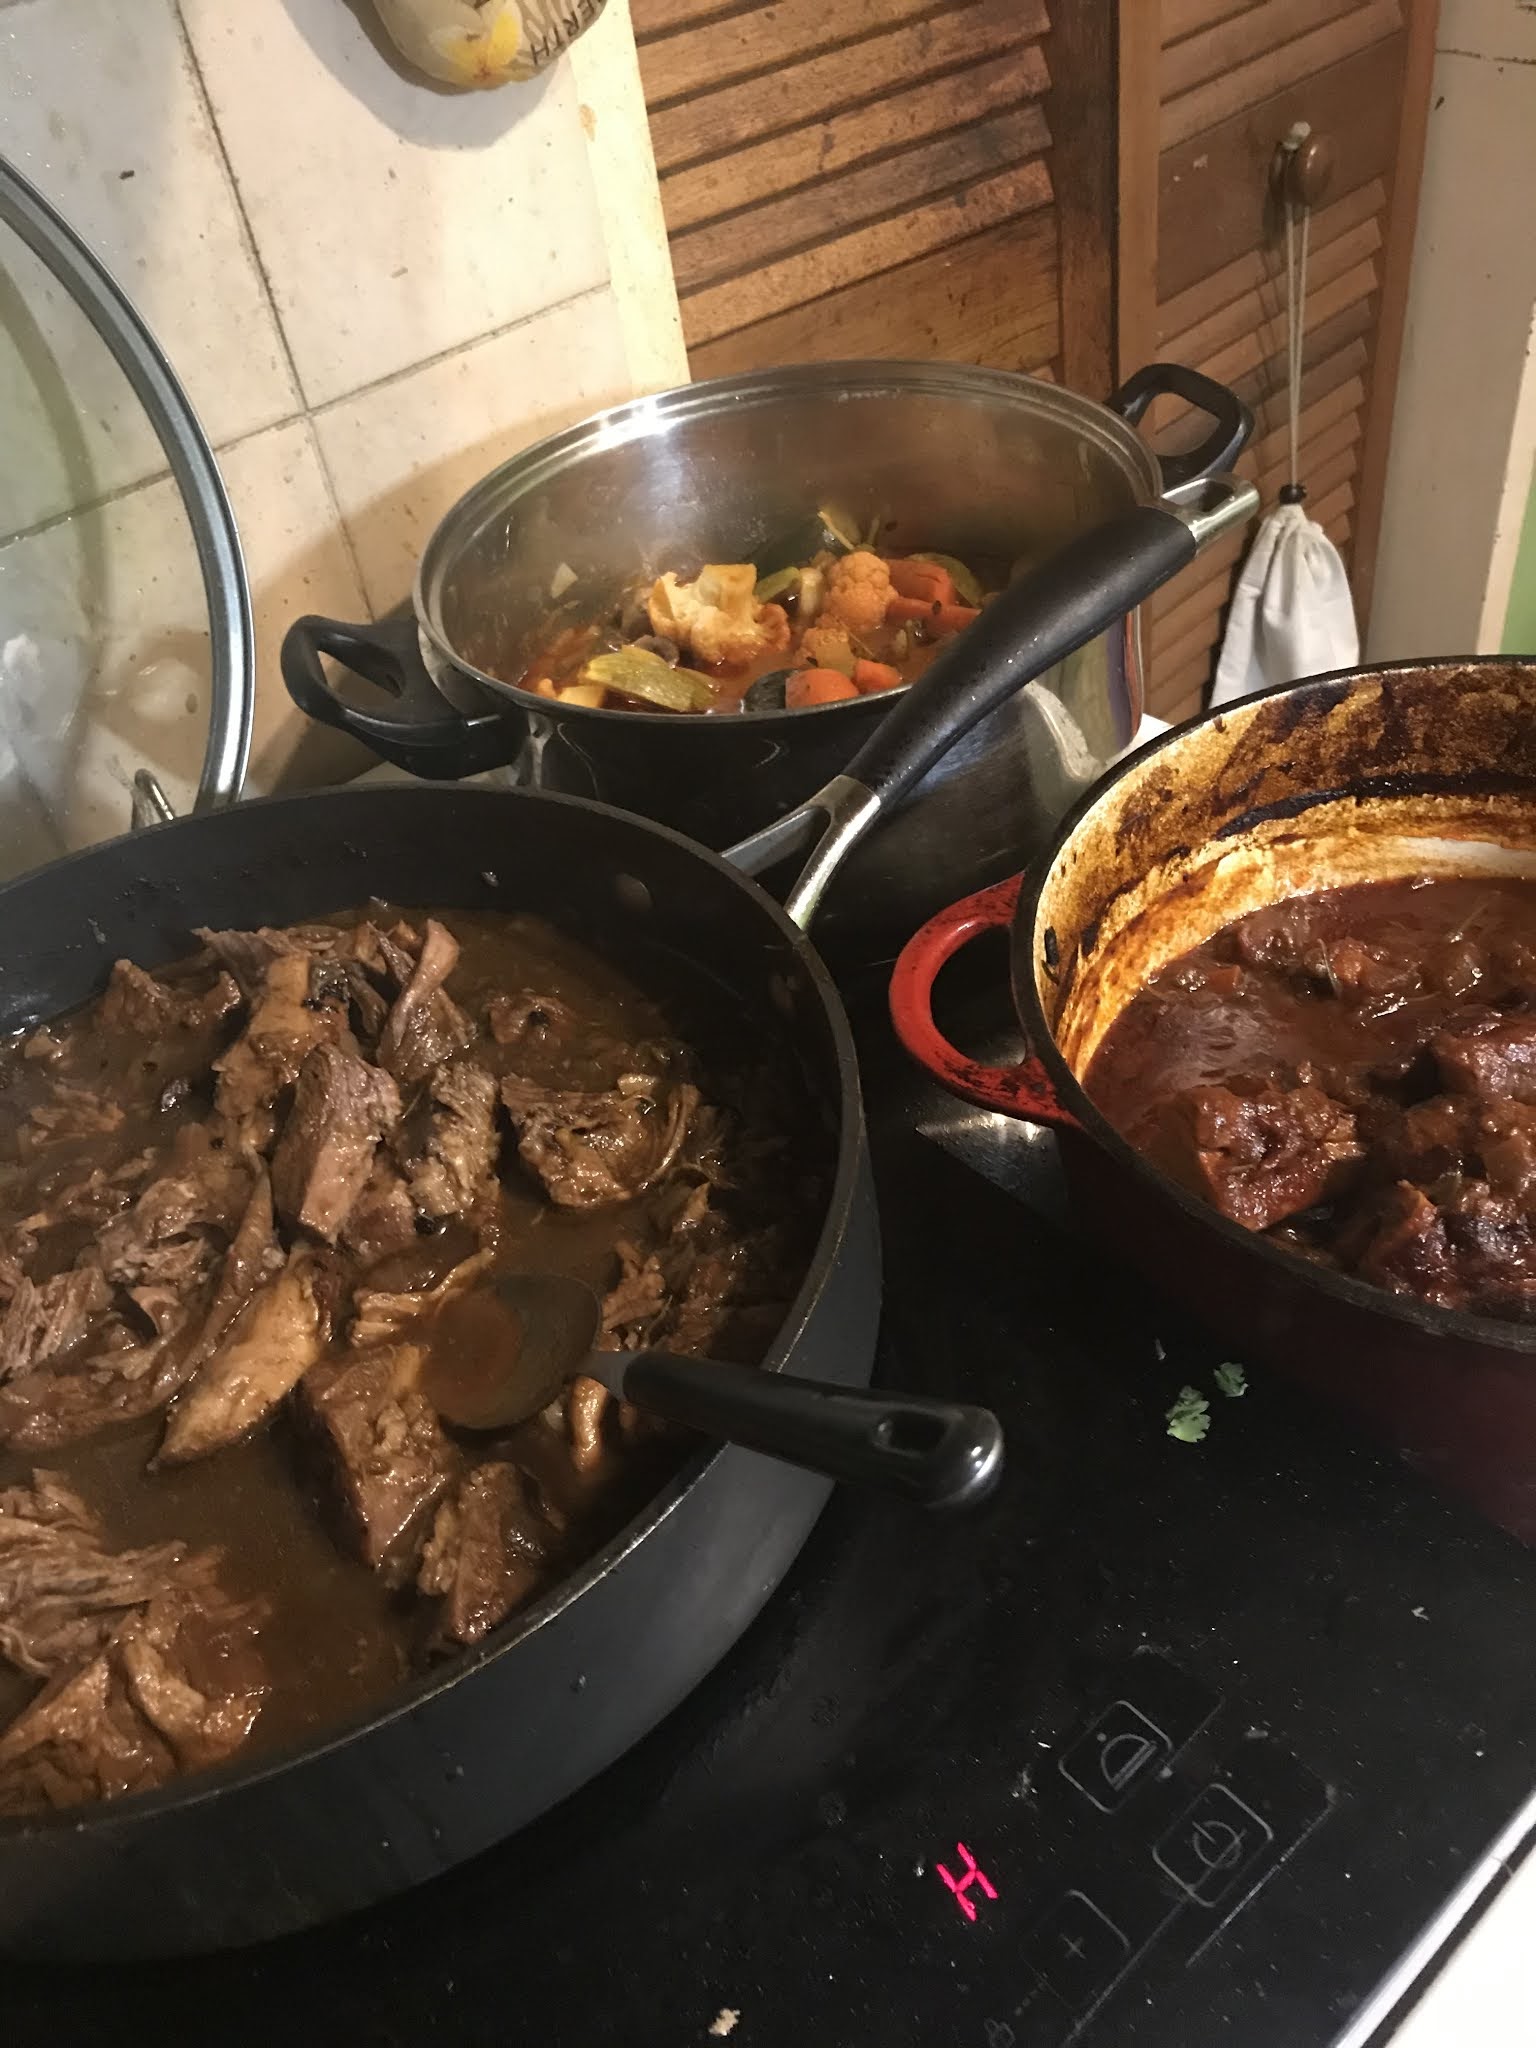
Firstly, braising is essentially a way of cooking larger pieces of meat and vegetables. Below you will see that I have used the ever popular lamb shanks, and pork shoulder with the bone in. Cooking on the bone is a great way to achieve extra flavour. When completely cooked the meat will fall from the bone with only the use of a spoon and fork. (Trust me on this. If you need a knife then it is not ready). Whole baby vegetables are also great for braising. They present nicely on the plate as well. Once you get the technique you'll be able to play around with it and find what is pleasing to you.

Brown the meat in a deep pan with a fitted lid. Enough oil in the pan to stop it sticking will be good. Amounts of oil in a recipe are somewhat misleading I find. The amount of oil required is more dependant on the size of the pan or size of the meat surface which touches the pan itself. You need enough oil to cover that surface. So to start, turn on the pan to medium heat. After a couple of minutes (get to know your stove and if it heats quickly or slowly) add the oil. If the oil gets a shimmer not unlike a heat shimmer on the surface of the road on a crazy hot summers day, then you are ready to add the meat. Brown the meat deeply on all sides. This is an essential step. The more browning, the more flavour in your end product. I can't stress enough the importance of browning the meat thoroughly to get extra flavour at recipes end. Once browned all over remove the meat from the cooking vessel and add a little more oil if needed (this may not be necessary)  and then add in the aromatics. Brown these also. What am I talking about here? The aromatics or aroma giving vegetables are traditionally carrot, onion, celery, and leek. Add all or a combination of these to the pan and cook over medium to high heat until browning starts to occur. At this stage add in other flavouring herbs or spices which may be prone to easy burning and cook out before adding back the main attraction i.e. the meat and deglazing the pan with beer, wine or stock to pick up the fond or those little bits of flavoursome goodness that have tried to attached themselves to the surface of your pan. At this stage add water or stock to approximately ⅔ cover the meat, top with a lid (this will shorten the time it takes for the water to boil)  and when it comes to a boil reduce the temperature so that the liquid is at a gentle simmer.

What is a simmer? A very gentle boil. Basically you want the water surface bubbling as gently as possible without causing the water to boil over the sides of your pan.

From here we simmer away until the meat is ready to fall from the bone. In the case of the lamb shanks you may wish to cook gently enough so that the meat is still attached to the bone for serving but requires only spoon and fork at the table to detach it from it's bone. Hopefully during cooking your sauce has reduced down to a nicely textured sauce to serve with your dish. However, if the sauce is too watery or runny you may need to remove the meat from the vessel and then with the lid removed simmer more vigorously to reduce the sauce to the consistency required. Now you can either plate your dish with the rich unctuous sauce or add some brightening garnishes. During braising the flavoursome vegetables that provided early layering of flavour have done their job. At the end we need to finish off with some brightening flavours and textures to bring some energy to the dish. An example from a traditional dish  is the French Beef Bourguignon which is finished with garnishes of pan fried mushrooms, crisp batons of bacon and topped with fresh parsley. 

Braised Lamb Shanks

Ingredients

2 tbsp neutral oil 

2 Lamb Shanks

Salt and pepper

3 sprigs Rosemary 

2 Brown Onions

2 stalks celery

2 carrots

4 cloves Garlic

2 cups red wine

2 cups low salt stock or homemade stock

2 tbsp tomato paste

400g chopped tomatoes

1/2 bunch Parsley

Method: 

1. Wash and dice the onion, carrot and celery. In most recipes it will make life easier if you go through and prep your ingredients prior to cooking the dish. There are exceptions where ingredients for example an apple will discolour after preparation but generally it will make life easier if you pre prepare your ingredients. This is what has already happened on most cooking shows. Yes you have a few more bowls to wash at night's end but mostly they only need a quick wipe out and they are clean anyway. It's worth it to make your cooking a less panicked and more relaxed affair. Remove the rosemary from the woody centre sprigs. Peel your garlic. To do this, simply press your chef's knife or other wide knife down on the side of the garlic clove. This will cause the white garlic skin which feels a little like paper to release from the garlic clove. Slice the garlic, not too finely. The finer the chop the more easily it will burn. In fact in this dish you could get away with tossing them in whole. Wash the parsley and separate the stems from the leaves. Now for parsley simple chopping the parsley leaves and stems together will be fine as the part of the stem that has leaves is quite thin and leaves don't need to be plucked as you would with basil. The lower part of the parsley stem though needs to be left as batons with a trimming of the base to remove any grit. These will be used to add flavour to our base right from the start of cooking. One last thing. When you get your shanks home from the shops take them from the butchers bag and season with salt. The earlier you season your meats the more tender and flavourful will be your resultant meal.

2. Okay on to cooking. This dish I started the cooking on the stovetop in a cast-iron casserole dish and finished in the oven. It could have also been cooked on the stovetop over low heat for the journey. The choice is yours. I find that in the oven you can leave it and forget it whilst you get on with your day but on the stove you need to give more attention to keep stirring and making sure the base of the dish is not burning. Turn on the heat and allow the casserole to heat for a few minutes over high heat. Add the oil and when it gets that heat shimmer add in your lamb shanks to brown. This step is integral to overall success. Brown deeply on all sides, this will give the rich, deep flavours to you recipe. If you find that it is burning rather than browning reduce your heat to medium and brown more slowly. This step could take 10 minutes. Be patient.

3. When browned remove the shanks to a side plate. Allow a minute or so for the heat to increase in your pan and then add in the chopped vegetables. If you need a little more oil don't be scared. How do you know if you need more oil? If the pan looks dry or you find the vegetables sticking to the base. Again, we want colour. Rich unctuous browning is building layers of flavour. After about  5 minutes add in the garlic. Stir to prevent burning. Add back the shanks, the rosemary and tomato paste. move the tomato paste around to stop it burning, though you do need for it to fry a little before you add other liquid. If you just stir it in you will get a rawish acidity to your finished dish. 

4. Just prior to the tomato paste starting to cook too much or burn add in the red wine to deglaze your dish. when you add it in get a spoon and scratch at the base and edges of your pot to release the browned edges of you ingredients. Those little yummy browned bits have a name and that name is fond. I just searched the word fond to confirm the meaning of the word and one of the google results says that the word fond is used incorrectly to describe the little brown bits attached to your pan. So, ... maybe don't use that. Little bits, yum, brown, add flavour. What else do you need to know. Reduce the red wine by half. How do you know that it is half in amongst all the other ingredients? You don't. Simmer for about 5 minutes and it'll be alright. 

5. Add in the parsley stems and tinned tomatoes. Pinch of pepper, teaspoon of sugar, stir in to incorporate. Why sugar? Why not salt? Sugar will bring out the sweetness of the tomatoes and balance the acidity in them as well. Salt was added to the shanks earlier before you started to cook. Lid on.

6. Transfer your cast-iron casserole dish to the oven which is hopefully pre-heated to 160 ℃ and leave it to do it's magic for 2 hours. Remove lid and allow liquid to reduce for another 30 minutes.

7. first check if the Shanks are ready. Does the meat still adhere to the bone? If yes give it another ½ hour and check again. If this is the case just make sure the sauce hasn't reduced too much and add a ¼ to ½ a cup of water to correct it needed. If the shanks are tender and ready to eat then you need to move them to a plate and check your sauce. If the sauce is thick enough to attach itself to you shanks then you simply need to test for seasoning. Take a spoonful and adjust with extra salt, pepper or even sugar if needed. If too sweet then you could even brighten the meal with a tablespoon of red wine vinegar. These slow cooked dishes can be comfort food heaven with all their richness and slowly built flavours, however, acidity or even a little pan-fried bacon or pancetta or mushrooms and fresh parsley could make a magical finishing touch. 

Asian Style pork Shoulder

Ingredients

500g Pork shoulder

2 tbsp. neutral oil

4 cloves garlic

2 ½ cm piece of ginger

2 medium brown onions

3 tbsp. hoisin sauce

1 stick cinnamon

3 star anise

3 tbsp. soy sauce

3 tbsp. brown sugar

2 tbsp. rice vinegar

1 tbsp. cloves

1 tbsp. black peppercorns 

water to half cover the pork

3 tbsp. Chinese rice wine

This second recipe is here to highlight the similarities from our first braising recipe above. Particularly note the browning of the meat, moving to the side to add aromatic or flavour building ingredients prior to adding liquid to slowly cook the meat and allow time for the flavours to permeate the Pork. This dish was prepared completely on the stovetop in a Sauté pan with a good fitting lid.   

Method

1. Dice the onion, peel the ginger and roughly chop it into small pieces. Ginger should be chopped smallish but really it isn't critical for it to be a fine dice or anything in particular. The joy of braising is that most things you add will breakdown during the cooking process.

2. Heat your high-sided pan with lid for a few minutes to get nice and hot. Add the oil and then the pork shoulder, on the bone is preferable. The rule is cook on the bone if possible as it will give flavour. When cooking is done the meat can be detached from the bone with no effort at all. Brown as we did in recipe 1 until well browned all over.

3. Move meat out of the pan. Give the pan a minute to regain it's heat and then add in the onions. Allow a few minutes for the onions to start to colour. When this occurs add in all the other ingredients except the water and the Chinese rice wine and the vinegar. Cook until the ingredients become aromatic which should only take a couple of minutes. Add in the Chinese rice wine to deglaze the pan and then add back in the Pork. Top with enough water to half cover the meat and use a wooden spoon to make sure that nothing has caught on the base of the pan. 

4. Bring to the boil then reduce to a gentle simmer and top with your lid. Simmer for a couple of hours or until a fork can pull the meat from the bone. 

5. In the case of this recipe as you won't be serving the meat on the bone you can simply pull apart the meat with a couple of forks, remove the bones and simmer until the sauce is thick enough for your liking. The other option, often used in Asian cooking is to thicken the sauce with a tablespoon of corn flour mixed with a little cool water and then poured into the sauce. When the sauce boils the sauce will thicken. When completed stir in the vinegar which will help brighten the dish and cut through some of the richness of the pork. 

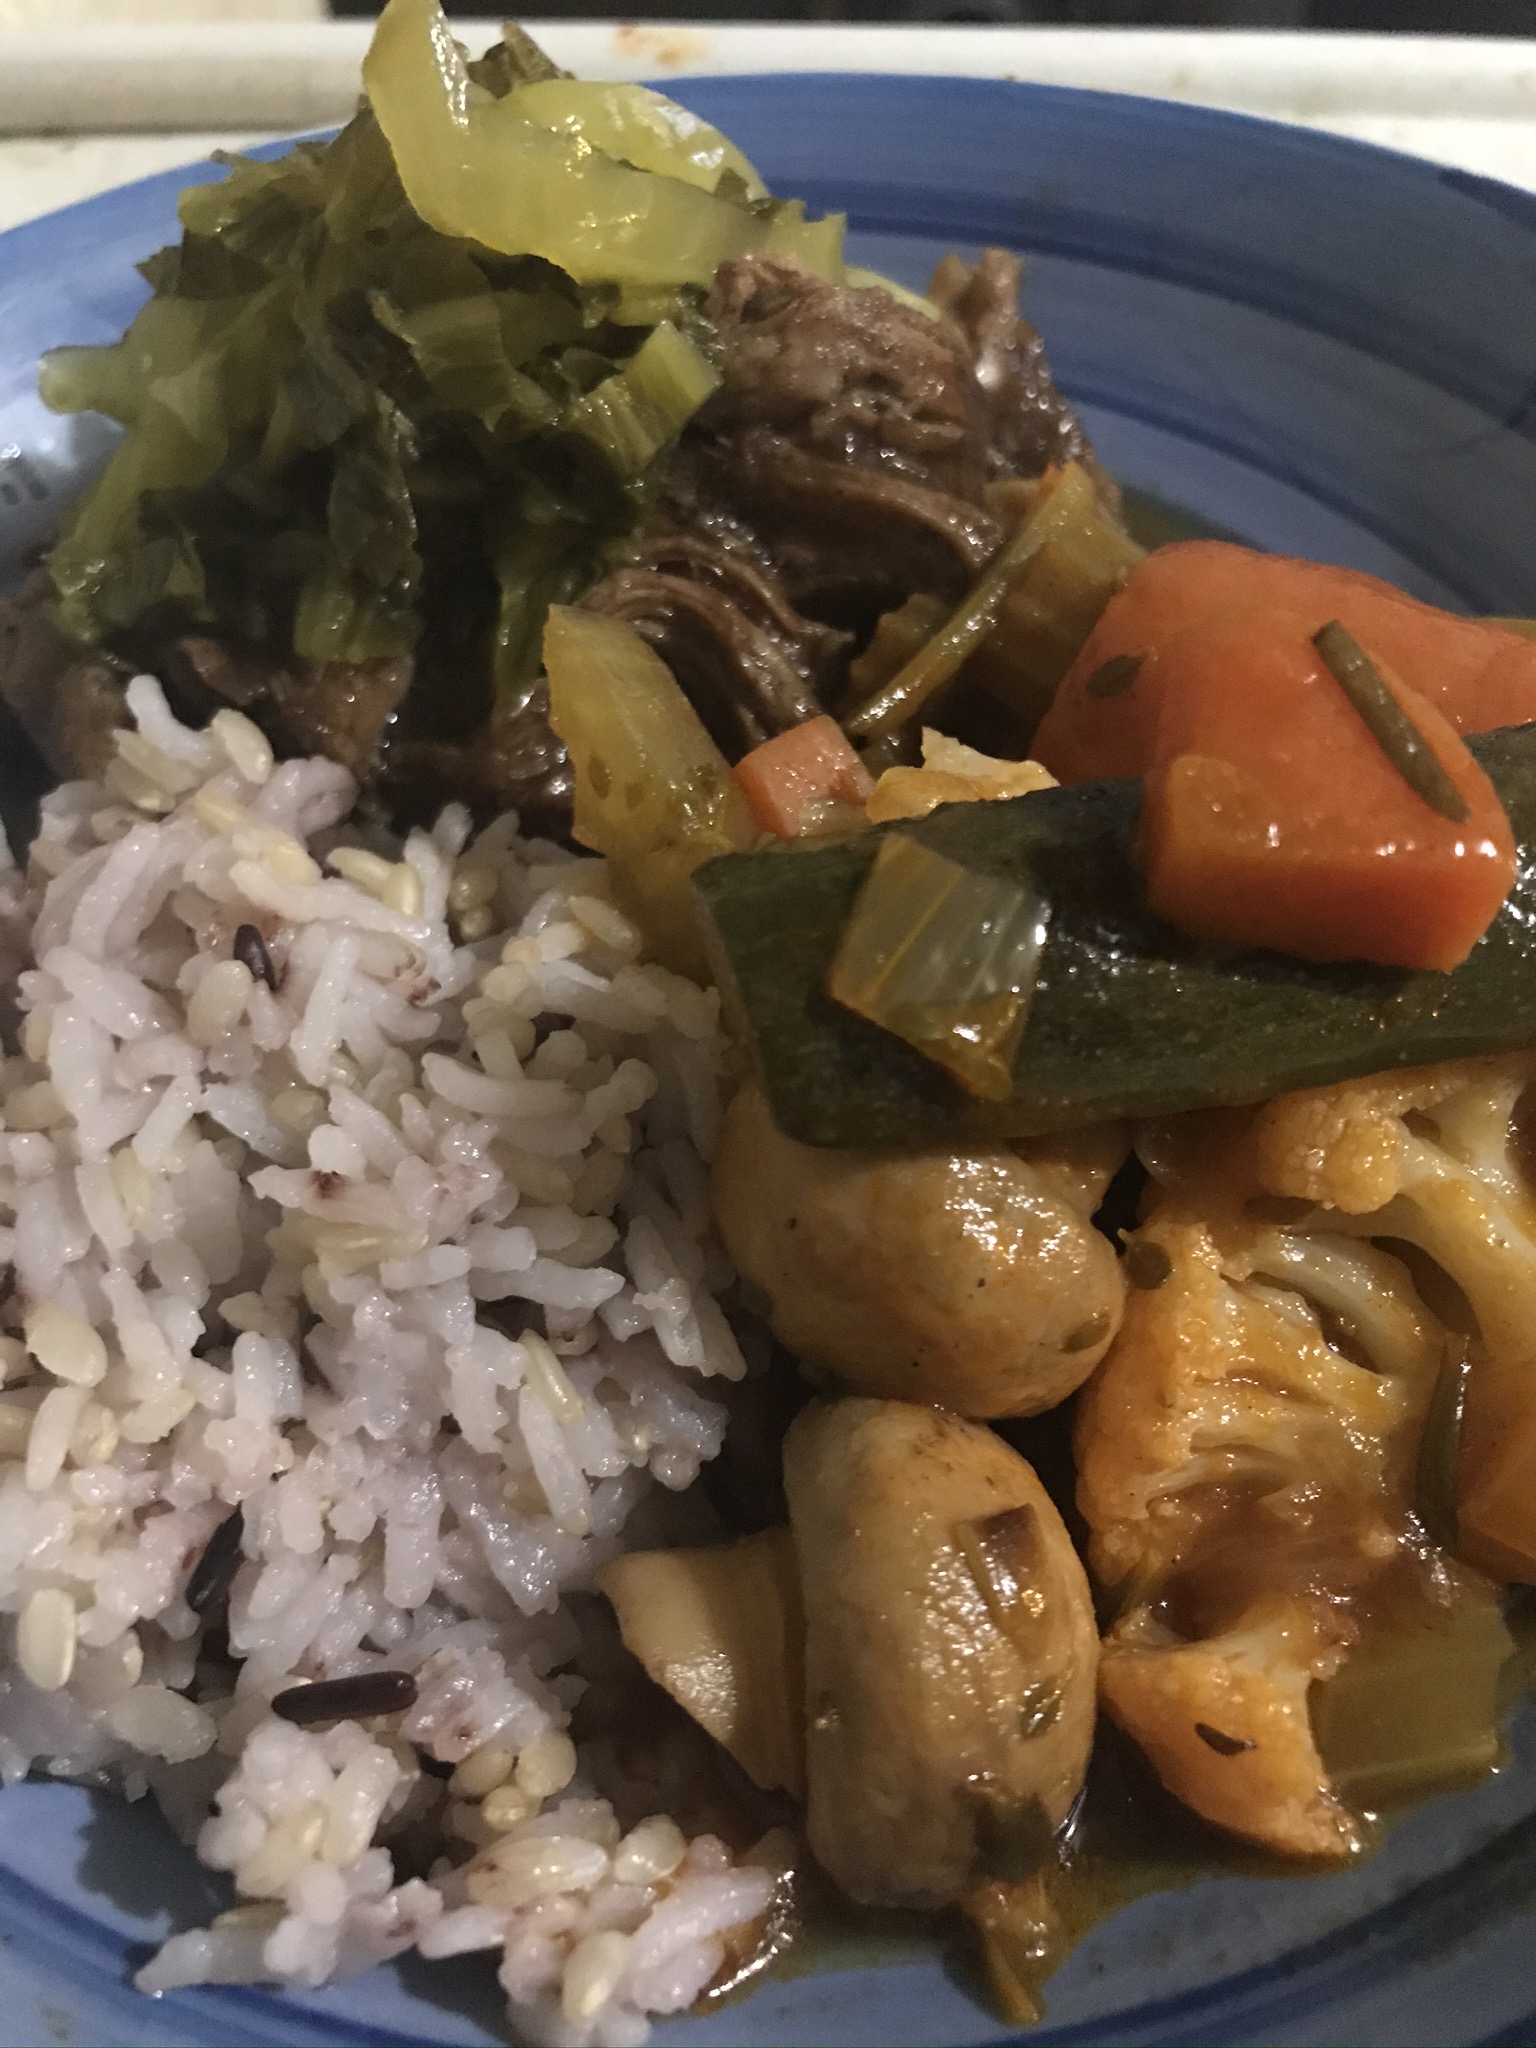
6. I would recommend serving the meal with steamed rice and garnish with pickled mustard greens which will bring acidity much like the vinegar but also some freshness and crunch.

Hopefully I have been able to show that even though these two dishes are very different from one another in origin they are both utilising very similar methods of cookery. Browning of meat and flavourings at the start of the process to build flavour and richness before simmering slowly to break down the proteins and give melt in the mouth meats filled with lovely rich flavours. 

Braised vegetables

Ingredients

1 tbsp. butter

1/2 kg mixed vegetables

2 bay leaves

500ml stock

a few sprigs of thyme 

3 cloves of garlic

1 onion 

1 carrot

2 tbsp. Tomato Paste 

Method

1. I bet you can almost guess the steps for this one. Dice the carrot and onion, peel and slice the garlic. For the half kilo of vegetables you are ideally looking for baby vegetables or at least smaller vegetables like young zucchini, mushrooms, cauliflower florets or really whatever you like to eat. 

2. Heat the pan, add the butter though you could use oil instead of or as well as the butter. Add in the diced onion and carrot. Cook for about 5 minutes or until you see some colour. Remember colour early on equals flavour at the end. Add in your larger vegetables and brown a little as you did with the meat in the first two recipes. Add in the tomato paste and cook out. 

3. You could use a little white wine to deglaze the pan at this point and reduce the wine before adding in the stock. Add in the bay leaves and Thyme sprigs. 

4. Simmer for around 20 minutes with the lid on or until the vegetables are tender but are still maintaining their structural integrity. 

5. Again as we did above, remove in this case, the large vegetables and then increase the temperature to thicken the sauce. Also at this time you should remove the bay leaves and sprigs of Thyme. 

6. When the sauce reaches the right consistency add back your large vegetables and fold in to coat with the sauce. 

I hope these three dishes illustrate the technique of braising in a way that can be bent and moulded to your needs. The most important thing is the technique of braising.

Very simple the steps are these:

Heat fat in deep pan.

Brown meat or vegetables. Set aside.

Add flavouring aromatics such as onion, carrot, celery and garlic or ginger. Brown.

Add back in meat or larger vegetables.

Deglaze the pan usually with wine or other alcohol.

Half cover with stock.

Cover with lid and simmer over low heat until meat or vegetables are  tender. 

Thicken sauce by reducing or by use of a thickening agent such as cornflour. 

Brighten the dish with a fresh or acidic or crisp garnish.

Serve with appropriate carb such as rice or mashed potato, although you could make an argument for a crisp roast potato to balance the saucy dish. 

I think that folks is the end of lesson 1. Hope you have enjoyed it and learnt something along the way. Most of all, Happy Cooking!!! 

Monday, 7 September 2020

My Guide To Making You A Better Cook


 Hi all. Plenty happening in my life at the moment. The contract is ending at my worksite in about a month and then it looks like a break from the workaday grind. I believe I am looking at a handy payout and think that this might be my chance to throw myself into a small business with a heavy online component. It is time to get creative. One of the ideas I have had is to post a series of blog and vlog posts of an instructional nature sharing what I know about food and cooking that can improve the meals that the average home cook is putting on the plate. Sure there are a whole heap of recipes out there but I believe that by focusing on a few cooking techniques I can give you a guide to more rapid improvement through greater understanding of what it is you are doing at the stove top. 

The areas of cookery I am looking at are braising and stewing, pan frying , Stir frying, crumbing and coating, roasting, soups, salads, and maybe even a barbecue lesson. I have noticed on some sites they have lessons that charge quite a bit for their lessons but as I am also learning as I go mine will at least for the foreseeable future, be free. 

What will I be sharing? Basically I will be getting my food nerd on and trying to teach not just what I know, but more importantly what I think will be helpful. I want you to be able to use recipes as general guidelines to you cooking, not carved in stone lists of instructions. I also want you to be able to go the shops any day of the week and cook something based on what you like the look of on the shelves or in the fruit and veg shop. 

Take a midweek meal. You walk into the shops thinking I have about 30 minutes to prepare the meal. Okay that probably eliminates roasting and braising. I've been eating heavy foods this week, looking for something light. Hmmm what is it I would like. Don't want too much clean up. It's a warm to hot night. How about a salad. It is dinner though so I need some substance to it. How about a nice Salmon fillet, skin on, pan fried served alongside a simple salad. Now the salad. Base mixed lettuce (a good handful) plus the usual culprits, tomato, cucumber, Spanish onion, capsicum and maybe a grated carrot. Now for a bit of an upgrade. Keep it simple. A handful of walnuts or almonds, a small tin of corn kernels for a sweet textural change up and maybe a few mushrooms or a tin of chickpeas to fill you up. Of course we need a dressing. Midweek means stick to basics, classic red wine vinaigrette, teaspoon of mustard ( Dijon is preferred but whatever is in the fridge will do) plus a 3 to 1 oil to vinegar mix. Olive oil and my go to is red wine vinegar. Of course if you saw a nice looking apple to add to your salad then maybe an apple cider vinaigrette would work better and if that were the case then maybe the pork medallion would go better. And on it goes. 

Eating is about choices. The more techniques you have at your disposal the better eating options and the more fun you'll have in the kitchen. And .. who knows? You might even impress someone as well. 

There is always a difficulty in teaching something that you find quite natural or easy to do. I've been working in kitchens for around 15 years now. That makes me feel old. Part of the challenge will be to do a bit of time travel, head back to beginner me. Head back to the a younger me hacking around in the kitchen, making mistakes or investing in loss to become a better cook. I want to get inside the mind of the beginner or learner. How do we do that? Go back to basics. I see teaching basics as being like a pro golfer out on the practice range. He or she doesn't just stand there hitting trick shots. Firstly they have to warm up, do some light stretching and then hit some basic shots focusing on hitting the ball nicely out of the centre of the club face. After that they can move on to more advanced techniques. A similar approach can be taken in the kitchen. Without a solid foundation in the basics, and I don't just mean doing, but also understanding then the more difficult dishes will be out of reach. I am a bit of a food nerd, I love to get in close and watch the simmering right up close and personal. Observing with Sherlock Holmes like scrutiny will improve you as a cook. Heston Blumenthal of the Fat Duck restaurant fame is big of questioning assumptions in relation to cooking. Just because you read somewhere that you should only turn a steak once when grilling it, doesn't mean that it is right. And, even if it is correct, it also doesn't meant that it is the only way. Cookery is not a maths test. There is more than one answer and usually a number of ways to get to the solution or in this case final dish. 

So, when can you expect to see the first lesson? Let's aim to have it up and ready to work through the written version by Sunday lunch. I have set myself a public deadline now it is time to deliver. Episode 1 of my guide to making you a better cook. Braising. 

Until then Happy Cooking!!!


Saturday, 22 August 2020

Recipe - Pork Bone Broth


Slow cooker Pork bone broth. Have you heard about bone broths? I saw a show on them some time back and it seemed to say that people were selling bone broth as some kind of substitute for your morning coffee. I think I still need caffeine to get me through to be honest. Having said that there are supposed to be some health benefits and at worst I will at least have some nice stock to use when making soups and the like over the next little while. The whole process is cheap and I intend to heat a mug of broth up in the morning to see if it is a nice thing to start the day. I did search Coles supermarket online and they are stocking a Campbell's bone broth in both chicken and beef and charging $7 for a half litre. The pork bones and and hock at my local butcher were selling for $4 / kg so I grabbed a kilogram of bones plus a couple of Pork hocks which set me back $6.80. I then ducked into the fruit and veggie shop and grabbed a soup packet mix containing Carrot, onion and celery for $1 and with that I had enough ingredients to make a simple pork bone broth. 

Ingredients:
1 kg Pork bones
2 pork hocks
2 onions
2 carrots
2 celery stalks
Oil to grease baking tray

Method:
 1. Lightly oil a baking tray and top with roughly chopped vegetables and the bones and hocks. Roast in a preheated 200ºC for 30 minutes or until the bones and vegetables are nicely browned. To be honest I was tempted to roast either at a little higher temperature or a for a longer time but thing I got the balance right. Why do we brown the stock ingredients first? Simple, flavour. Browning will give the stock more of a kick.

2. Transfer the the contents of the tray to your slow cooker and cover with 2 litres of water. Yes, you could simmer your stock on the stove-top but then you will need to pay more attention to it during cooking. In my case I have switched the slow cooker to high and will turn it to low when I go to bed. When I wake in the morning the stock will have been cooking for about 15 hours. At this point I am tempted to keep it on low whilst I am at work tomorrow which will mean that the stock will have simmered for around 27 hours by the time I strain it and have it ready to use tomorrow evening.  

3. The process is a little too easy to describe. After the allotted time simply strain the liquid and jar for storage. to use as a hot beverage I simply filled a microwave safe cup and buzzed it in the microwave for 2 minutes. The broth is great as an internal warmer on a cold winter's morning and I seems to be quite effective in reducing food craving throughout the day. I highly recommend giving it a go and adding bone broth to your morning routine.
 

Sunday, 26 July 2020

Recipe - Kimchi

Another busy Sunday morning of preserving should see me testing out my homemade Kimchi in time for next weekend. Again I have used the incite and descriptions from LifebyMikeg on instagram to get the basic recipe and then run with it. Another preserved food that hopefully helps with the growth of good bacteria to give the body overall health and well-being. 
As you can no doubt tell I am really getting into preserving and also just the why buy processed supermarket style if you can do it yourself. The way I see it by making it yourself you can control what goes into your food and by doing so limit the intake of dodgy additives in your daily diet. A recent visit to the Doctor and a blood test or 2 later and I found out that my Cholesterol was on the high side. The Doctor has given me six months to get it right through diet and exercise and then if I can't make the changes I'll have to start popping pills to fix the problem. The way I see it, at age 46 I can either use this as a motivation for change or join the masses in becoming a medicated member of society. The choice is simple. The diet part of the equation has to include improved gut health and preserved foods like kimchi and sauerkraut with their active good bacteria are part of the journey.
So before I get too bogged down let's get to the recipe...

Ingredients :
2 large Chinese Cabbages
Salt
4 small red apples (peeled and cored)
½ Daikon Radish 
4 tablespoons Korean Red Pepper Powder
Fish Sauce
4 Tablespoons of Glutinous rice flour
1 Litre of water
4 cm knob of Ginger
4 cloves Garlic
Description:
1. First thing is to cut up your cabbages by slicing across the leaves at 2 cm intervals to evenly slice the leaves. Once sliced up season very generously with salt, cover with a couple of dinner plates or other weighted item to apply pressure to your cabbage and force out the liquid. Leave to stand overnight. Whilst I originally had the cabbage in a stockpot and a large mixing bowl after a few hours I was able to transfer it all to the stockpot and weight it down with 2 dinner plates and cover with the lid of the stockpot to prevent the chance of any unwanted things getting into the cabbage.
2. Onto the fun stuff. Rinse the cabbage with water to wash off the salt and then drain thoroughly. I used a salad spinner to help with the drying. Dice up your apple and shred or grate the radish. Place the diced apple in water to stop the browning. I used the a green papaya shredded to shred the radish but you could just grate or even dice the radish.

3. Peel garlic and ginger and whizz in a food processor to a fine mince. 
 
4. Add the water and flour to a saucepan and whisk enthusiastically to dissolve the flour in the water to form a white paste. Add in the ginger and garlic and whisk to mix through. Add in the Korean Chilli powder to form a thick red paste. This paste is what gives the kimchi it's distinctive red colouring. Allow to cool, at least enough so that you are able to mix it with the cabbage without either cooking the cabbage or possibly more importantly, burning your hands. 
5. Now put the apple cabbage and radish together in  large bowl. Pour over the red paste and mix thoroughly so that the cabbage is evenly coated. 

6. Once done transfer the kimchi to large jars to let the preserving begin. I have heard that the preserving takes between 3 and 7 days but as this is my first time making I will have to wait and see what is successful. Each day during the preserve I will be forcing the cabbage down into the jars to make sure that the cabbage is fully submerged. In fact after about the first 4 hours I will be using the Pestle from my Thai Green Papaya Krok to force the cabbage beneath the surface of the kimchi liquid. As the jars will be sealed I will need to remove the lids each day to allow gas to escape and prevent the reactions from causing breakages to the glass jars.

Whilst we are all wondering when we will see an end to Covid and and restrictions on our lifestyles it is great to be able to spend the time indoors doing something productive and who knows, maybe I can turn this into a business that one day pays the bills. Until then it is just a fun way to spend a Sunday. Happy cooking!!!


Tuesday, 14 July 2020

Thai Thae Hurstville

Tuesday night saw our first dine in meal since the Covid pandemic hit our shores back in early March and it was to Thai Thae at Hurstville that we decided to pay a visit for our 7th Anniversary of our Thai Wedding in Chiangmai back in 2013. Of course we had to eat Thai food. 
This local place has a great range of dishes which includes the usual suspects but then takes it to another level with plenty of interesting dishes to keep you coming back. I wrote a review for this restaurant a few years ago on my old semi retired blog and said it was great then. Back then the menu seemed a little limited but now the menu has expanded quite a bit and I can't wait to get back and give it another try. 

So, on to our meal. Initially we were thinking 2 mains and an entree but then decided that if we grabbed a green papaya salad we could try two others mains no worries at all. So that is what we did.

Thai food is traditionally eaten as shared dishes amongst the group of people eating. Basically all the food to be eaten is put on the table and each person has a plate of rice and eats by taking small amounts (around two spoonfuls) of each dish one at a time and eating with the rice . In Thai dishes are described as gup Khaao or in English "with rice", and used almost to flavour your rice. This view is obviously a little challenging for Europeans and probably others as well, but could be thought of in a similar way to the way Italians think of flavouring pasta with sauces which are far less saucy that those used by those of us eating pasta in other parts of the world.

Maybe I need to get back on track. We ordered three great dishes. Som Dtum or Green Papaya Salad which was good, though I asked for medium heat and found the spiciness a little less than I like. Next time I'll need to ask for hot. If Som Dtum is new to you, make sure you give it a try. It is a salad made up of shredded green papaya which is pounded up with a wooden pestle with garlic, chilli, palm sugar and more to give a spicy, sweet and salty salad.

We also had the Deep Fried Tilapia with garlic. Thai fish is fried whole, no batter, just deep fried I think, in a wok until cooked through, then topped with enough fried garlic to cover the fish almost completely. You would think this would be too garlicky but the garlic is mellowed by the frying and extremely delicious. It was on this occasion. It is also served with a house made sauce to dip your fish in after you pull the flesh away from the bones. Give it a try, it is great and has the added bonus of attracting table envy from nearby patrons.
 
And our final dish we picked from the Chef suggestions portion of the menu called Kai Look keuy. You will notice that the menu item is written in transliterated Thai and is therefore fairly unhelpful to non Thai speakers. Kai is egg and the rest, well your guess is as good as mine. The description underneath the item on the menu though drew me in and I had to give it a try. I was not disappointed. That description said "Medium boiled eggs and deep fried and crispy pork topped with sweet and sour tamarind sauce" The sentence structure may not have won you an English prize in High School but the plate of food was a winner. Eggs boiled and then deep fried served on a bed of crispy pork belly mouthfuls swimming in a sweet and sticky tamarind sauce. Yes you are right, this is not something you GP wants you eating daily, though you would keep him busy if you did, but it was absolutely yum.
This was a great meal at a very affordable price and comes highly recommended by this happy eater. Great to be back out eating after lock-down and hope everyone behaves so we can continue to eat out more and more. Until next time , Happy Eating!!!

Thai Thae Restaurant - Shop 1, 33 MacMahon Street, Hurstville, NSW

Sunday, 5 July 2020

Recipe - Green Sriracha Chilli Sauce


Sunday morning preserving. Last night we ate a German sausage plate with my homemade Sauerkraut which I have made last weekend. It tasted great, so on the heels of that success it was time to give the amazing Thai Green Sriracha Chilli sauce a go. Red Sriracha is great but I must say that my tastes lean slightly towards the Green lesser known cousin because it has a little more acidity to it and is awesome for adding a little heat and flavour to a dish where the flavours aren't jumping up hitting you in the face. 

Where should we start? A little bit of history perhaps? Why not? I stole these facts from a Los Angeles Times article which appears to have taken them from a documentary film called "Sriracha". So, it turns out the Sriracha Sauce is made in the U.S.A. by a Vietnamese immigrant who was a refugee from the Vietnam War, also known as the American War if you are Vietnamese to differentiate it from the numerous other wars in that 331,212 km² country. That makes Vietnam about 40% of New South Wales in terms of size. In terms of impact on modern history it is fair to say they are punching above their weight. But I digress. Huy Fong Foods is the name of the company which makes Sriracha and it's owner David Tran has been making it since the 1970's when he saw a need for hot sauce in his new home country. He borrowed the recipe and adapted it from a Thai hot sauce recipe which originates in Si Racha District in Chonburi province which is 120 km South East of Bangkok. The snippets of information about David Tran seem pretty cool and are well worth checking out. 

And on to the sauce.

The amazing thing about Sriracha is that it is a fermented chilli sauce which is why I have tagged it under preserving. 

So... I grabbed a bag of long green chillies because they were on special at the local fruit shop and I de-seeded most of them, not sure how much heat I will be left with, but as they say "live and learn". After de-seeding I put them along with a little ginger and a couple of garlic cloves into my food processor with a tablespoon each of brown sugar, white sugar and salt and on high whizzed for 4 minutes. After about a minute the mix had me a little anxious about the texture but within 2 minutes the liquid had released from the chillies and by the end I was left with a chunky wet chilli mass. 
It is almost too easy to call it a recipe. I transferred the sauce to a glass Pyrex bowl with a lid and will now begin preserving until next weekend. Each day I will give it a good stir. The objective is to turn the sauce each day to stop prolonged exposure to the air. 

Well that's about it for now. Will (promise I really will) add to this post next Saturday or maybe even Friday if I get too impatient to wait. The process at that point is to add a little vinegar, maybe rice vinegar or white vinegar and process it to a fine sauce. I have seen that in some recipes they cook the sauce after adding the vinegar but I will be playing it by ear and if cooking seems unnecessary I will be bottling and devouring. 
So, it's next Saturday. and after stirring or more accurately turning over the chunky green goodness that is my sauce daily from Sunday to Saturday I have taken the next steps to completion. Things to note: After a couple of days you will notice that tiny air bubbles pop up after turning the chilli paste. The reason for this is that the carbon dioxide is attempting to escape from the chillies. At least I think that is what is happening. The chilli paste could be left to ferment longer but for this first attempt I am far too impatient and excited to wait longer than 6 days. In future attempts I hope to lay down longer ferments and see what will be the impact on the flavour and appearance. That is for another day.

Okay so what I need to do is add the chilli mass to a blender with vinegar. I used about 90 ml of rice wine vinegar and white vinegar. I then blended until I had a smoothish green liquid of spicy joy. Okay, so here is where it got a little tricky. The original recipe I watched said that this is all you had to do. Jar it, fridge it and enjoy the fruits of your labours. I looked up a number of recipes on the net and found that most, if not all added a heating step (probably to kill bacteria and mellow flavours). I was unsure but thought I should travel with the herd and decided to heat the sauce in a small saucepan for 10 minutes. The usual here, bring to boil and then reduce heat and simmer. 10 minutes total. 
Once done allow to cool (whilst you finish a blog post) and then jar it up for storage. Once cooled sufficiently I decided that the sauce would be improved by pushing it through a strainer. I added a ladle at a time to a small hand held strainer and pushed through the sauce with the back of a wooden spoon. Ladies and Gentlemen we have a jar of Green Sriracha. Yay!!! 
Conclusion: The two steps that I added on the run, being the heating of the sauce for 10 minutes and the pushing through a strainer both improved the finished product in my opinion. I think the heating gave a more rounded flavour to the sauce and has hopefully added to it's shelf life. Having said that, a long shelf life may be irrelevant with this first batch because I am planning to eat it pretty quickly. Once it becomes a part of my regular preserving though I may slow down consumption and need it to last more that a week or two. Step two the strainer I think really adds to the professional long and texture of the sauce. Obviously you could leave either or both of these steps out and see how it goes.
Until next time, Happy cooking!!! 

Love's Kitchen

  I was doing the regular scan of Netflix and Prime video on Saturday night and found this "food movie"  on Prime. The story is ab...